How to Edit a PDF (on Mac & Windows)
In order to fill out or modify a PDF, it requires editing software designed specifically for this type of file. We offer our users a free online PDF editor that possesses the necessary tools to customize your document.
Users will have the capability of, amongst other things, adding/editing text, e-signing, and making various annotations. Once finished, your document can be emailed, downloaded, and/or printed free of charge. Refer to the guide below to better understand the possibilities associated with our editor.
1. Uploading Your Document
To make changes to your PDF, you must first upload the document to the website. Any files uploaded to the website will remain 100% protected as a result of our encryption-based security system.
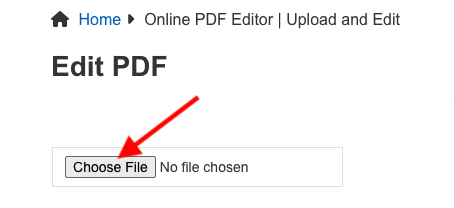
This action can be accomplished by clicking the “Choose File” button located at the top of the page and selecting the desired PDF contained within your local computer or mobile device.
Users can alternatively drag & drop the file into the designated area of the webpage if preferred.
2. Adding Text
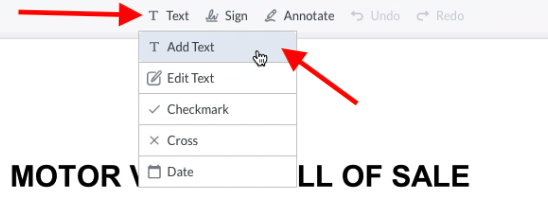
Most individuals seeking to utilize a PDF editor are doing so to fill in the areas of a blank form. For non-fillable forms, users can click the “Text” tab found in the toolbar above the document. A drop-down menu will then appear where you can select the option to “Add Text“.
Once selected, a text box will appear on the document that can be dragged to the preferred area of the form. Users can then input the desired wording and adjust the style, color, and size of the font to meet their specifications.
Additionally, this tab also allows individuals the ability to add checkmarks, crosses, and the current date if the user requires such features.
3. Editing Text
If someone wishes to modify the existing text contained within a PDF, they can do so by clicking the “Text” tab (as shown in the previous step) and choosing the “Edit Text” feature.
The user will then be able to alter the text contained within the document by highlighting the desired characters and clicking the edit icon, prompting a window to appear that enables them to replace the wording as they see fit.
After the edits have been made, the user can click “Save” to finalize the changes.

4. Signing
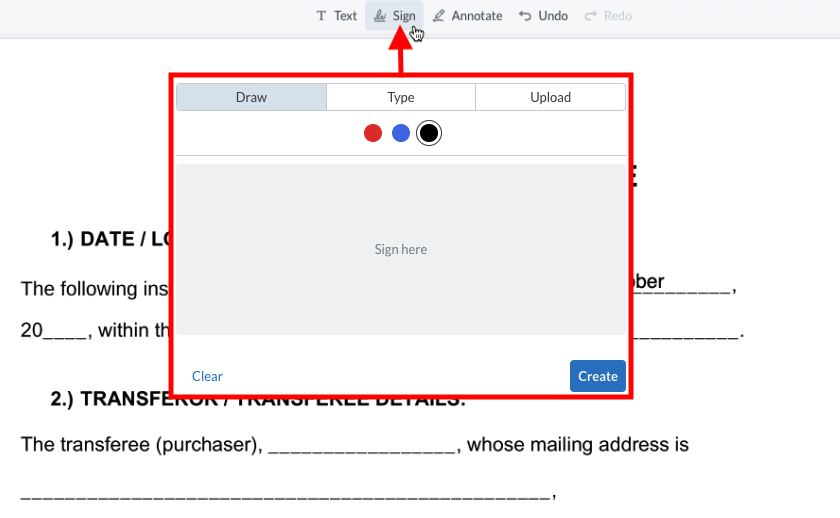
For those interested in adding their signature to a PDF, click the “Sign” option displayed in the main menu. You will then be presented with the option of drawing, typing, or uploading an image of your endorsement.
Once generated, you may click “Create” to add it to the document. It can then be relocated to any portion of the page that you wish by grabbing it with the cursor.
5. Erase (Whiteout)
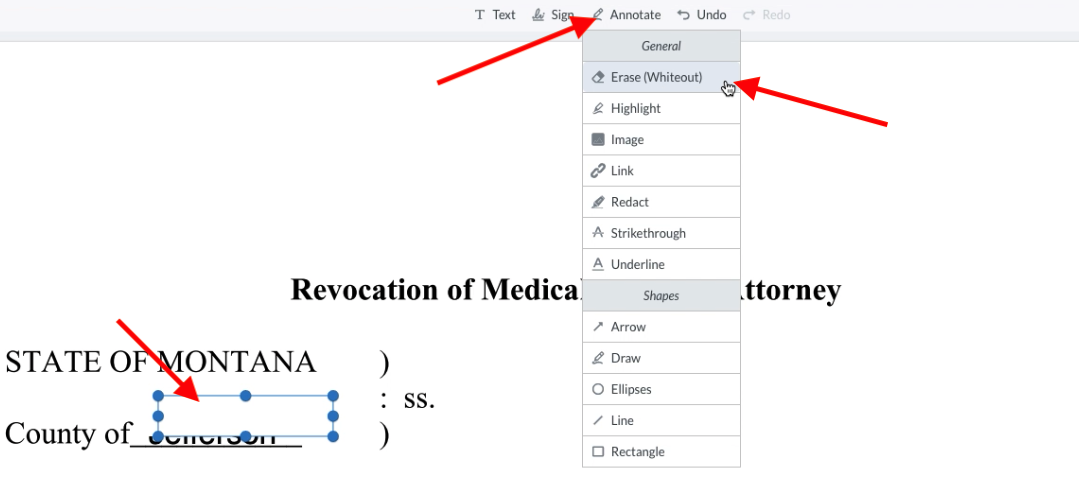
Another popular feature utilized by many is the erase/whiteout tool. This is something that can remove portions of a PDF that the user feels is unnecessary.
To carry this out, select the “Annotate” option of the toolbar and click “Erase (Whiteout)“. A white rectangle will then appear on the document that can be adjusted to cover any area of the page, thus hiding the content contained underneath.
6. Highlighting
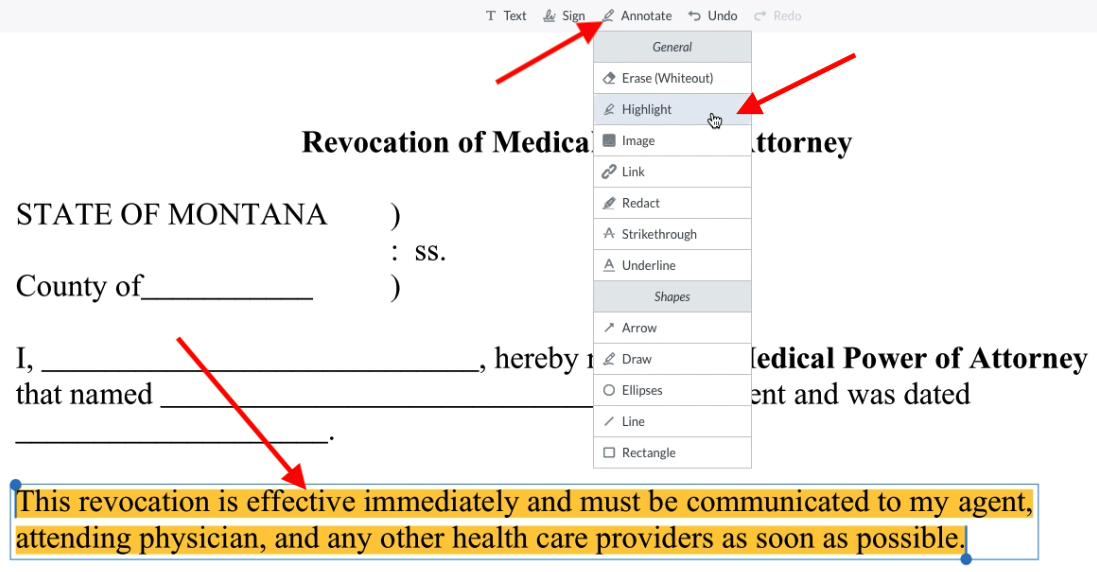
Users wishing to highlight certain sections of text within a PDF can achieve so by selecting “Annotate“, then “Highlight“. Afterwhich, they will have the capability of highlighting any portion of the form with the cursor.
The default color is yellow, but there is an array of other colors that can be used. To remove any highlights that have been made, you can select the affected text at any time and click the trash can symbol that appears below.
7. Adding an Image
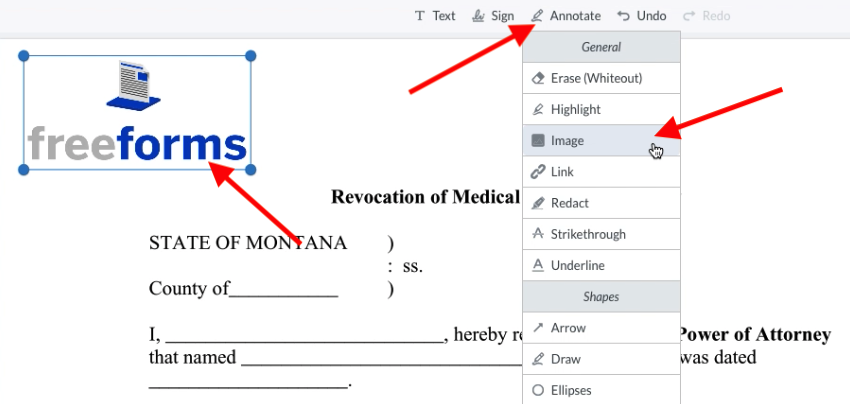
If you would like to insert an image into a PDF, click “Annotate” in the main toolbar and select “Image“. You must then click any area of the page to select a file that is contained on your computer, phone, or tablet.
After you choose your desired image, it will appear on the document where you can resize and place it anywhere you wish. (You can remove the image at any time.)
8. Adding Links
In some cases, a person may want to add a link to their PDF if they plan on offering it to others digitally. The editor contains a tool that provides this opportunity to users.
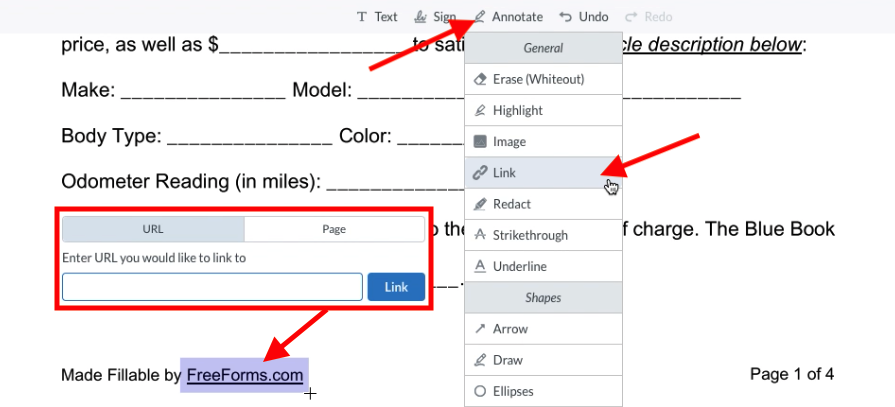
This is executed by selecting “Link” located under the “Annotate” section of the toolbar. The user will then be prompted to drag a translucent rectangle over the area where they want to position the link.
Once placed, a window will appear where you can input the address of a website (e.g., https://freeforms.com). You may also link another page of the PDF that will automatically direct the person that clicks on it to that portion of the document.
After you have entered the desired URL or page number, click the “Link” button to complete the process.
9. Redacting
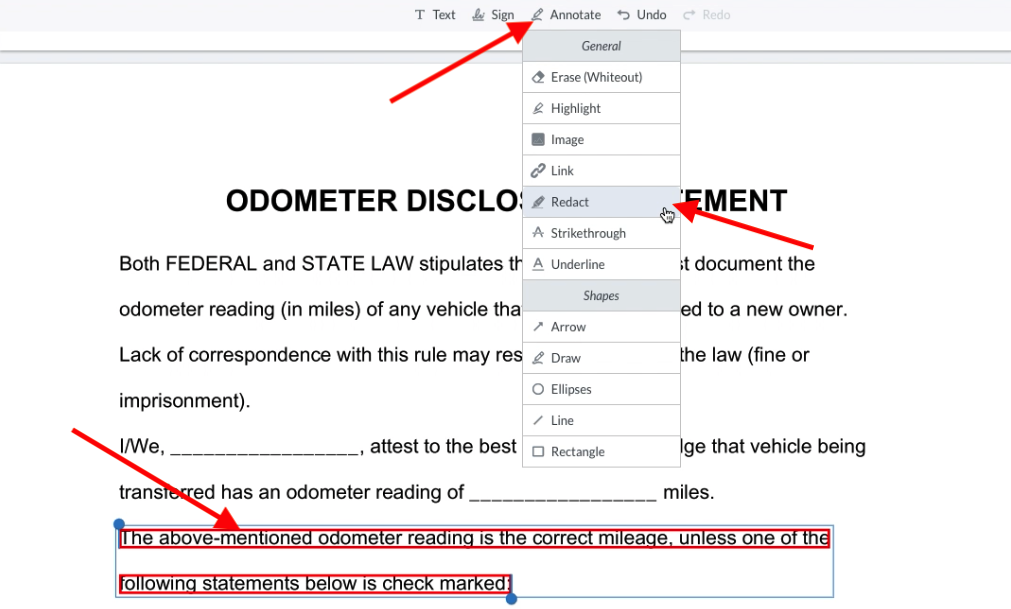
The redacting tool is used to obscure portions of a document, typically for legal or security purposes. It appears as solid black blocks that can cover various lines of text.
To apply this to a PDF, interested parties may go to the “Annotate” section of the menu and choose “Redact“. They can then highlight any portion of text and click the “✓” button to fulfill the redaction.
Keep in mind that once a redaction has been set, it cannot be reversed.
10. Strikethrough
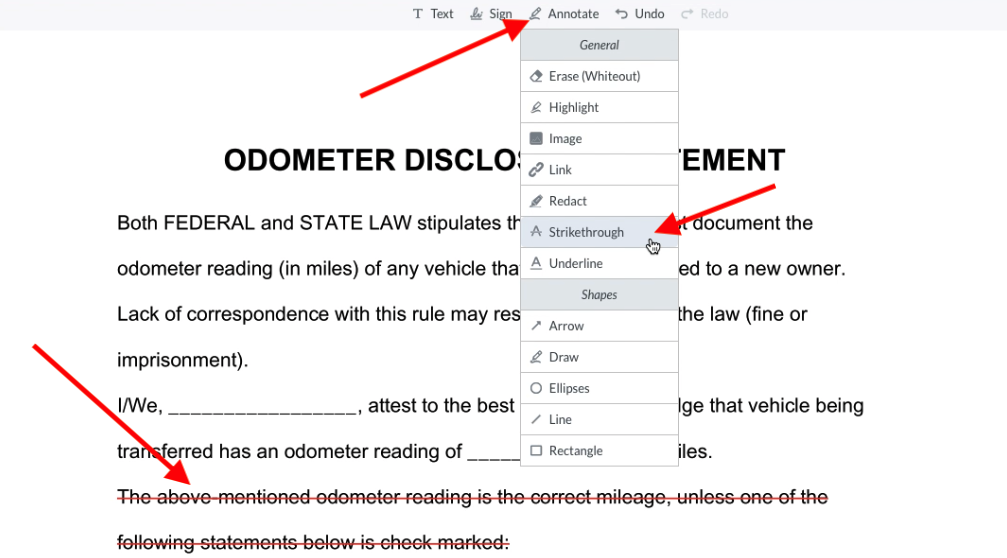
With the strikethrough feature, individuals can cross out any line of text or individual words contained within a PDF. This is oftentimes used in contracts where one party wishes to indicate the removal of a clause.
Unlike a redaction which is used to completely obscure the text underneath, this method still allows anybody viewing the document to see what was originally written in the instrument.
To apply this to a PDF, navigate your way to the “Annotate” tab and click “Strikethrough“, then highlight the sentences that are applicable.
11. Underlining
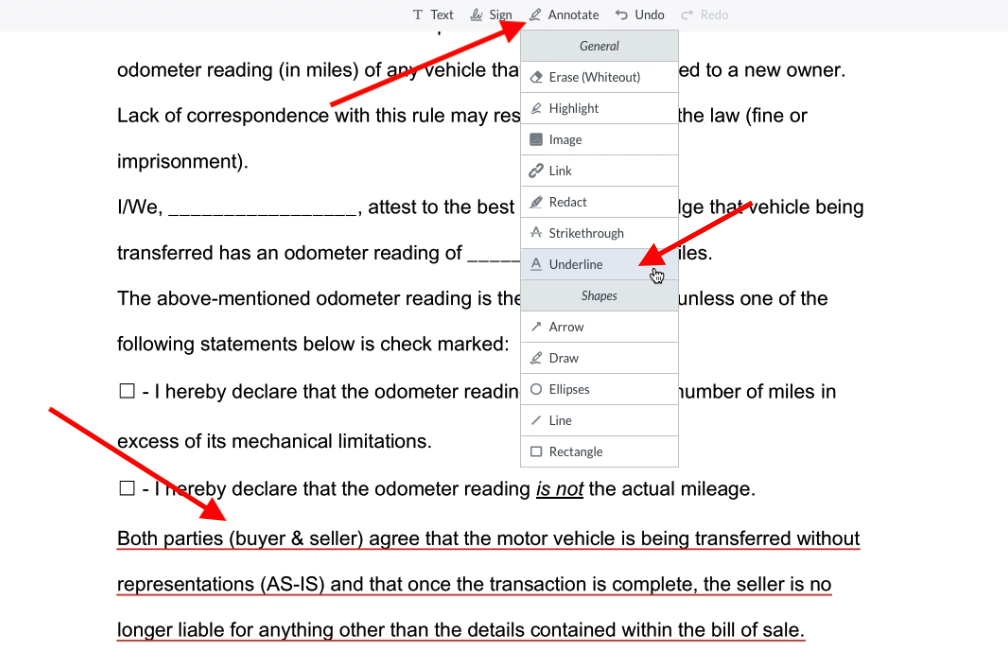
Anybody who wishes to underline certain portions of text within a PDF can accomplish this task by going to the “Annotate” tab and selecting “Underline“.
You can then designate which words or sentences you want to be underlined by highlighting them. Once set, you can click on the underlined text to change the color if you wish.
12. Adding Shapes
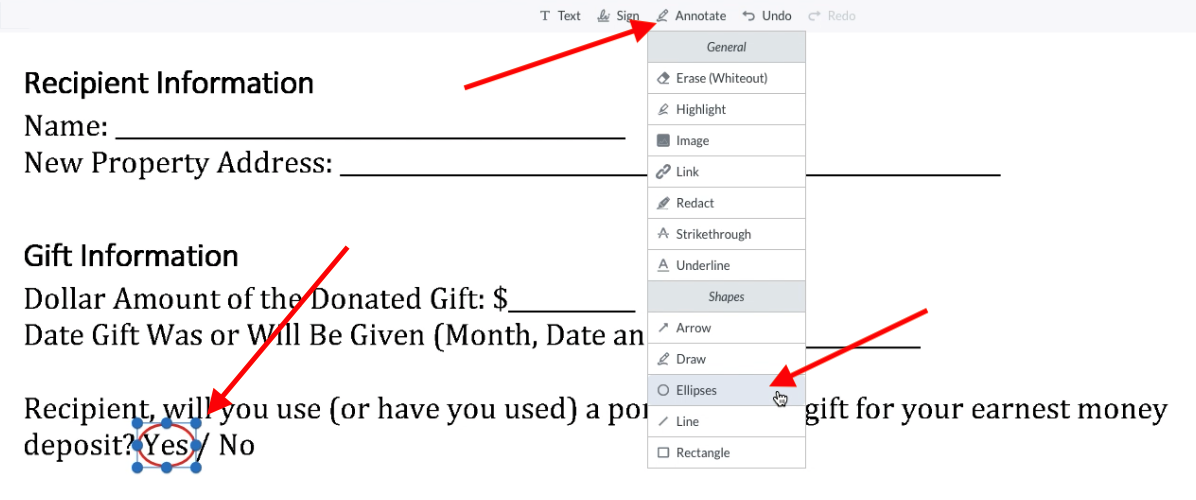
Users can add arrows, ellipses, lines, rectangles, and drawings to any PDF by visiting the “Shapes” section under “Annotate“.
Once you have selected one of the shapes, you can use the cursor to place it on the desired page of the document. You can then customize the size, stroke, and color of the shape by clicking on it.
13. Managing Pages
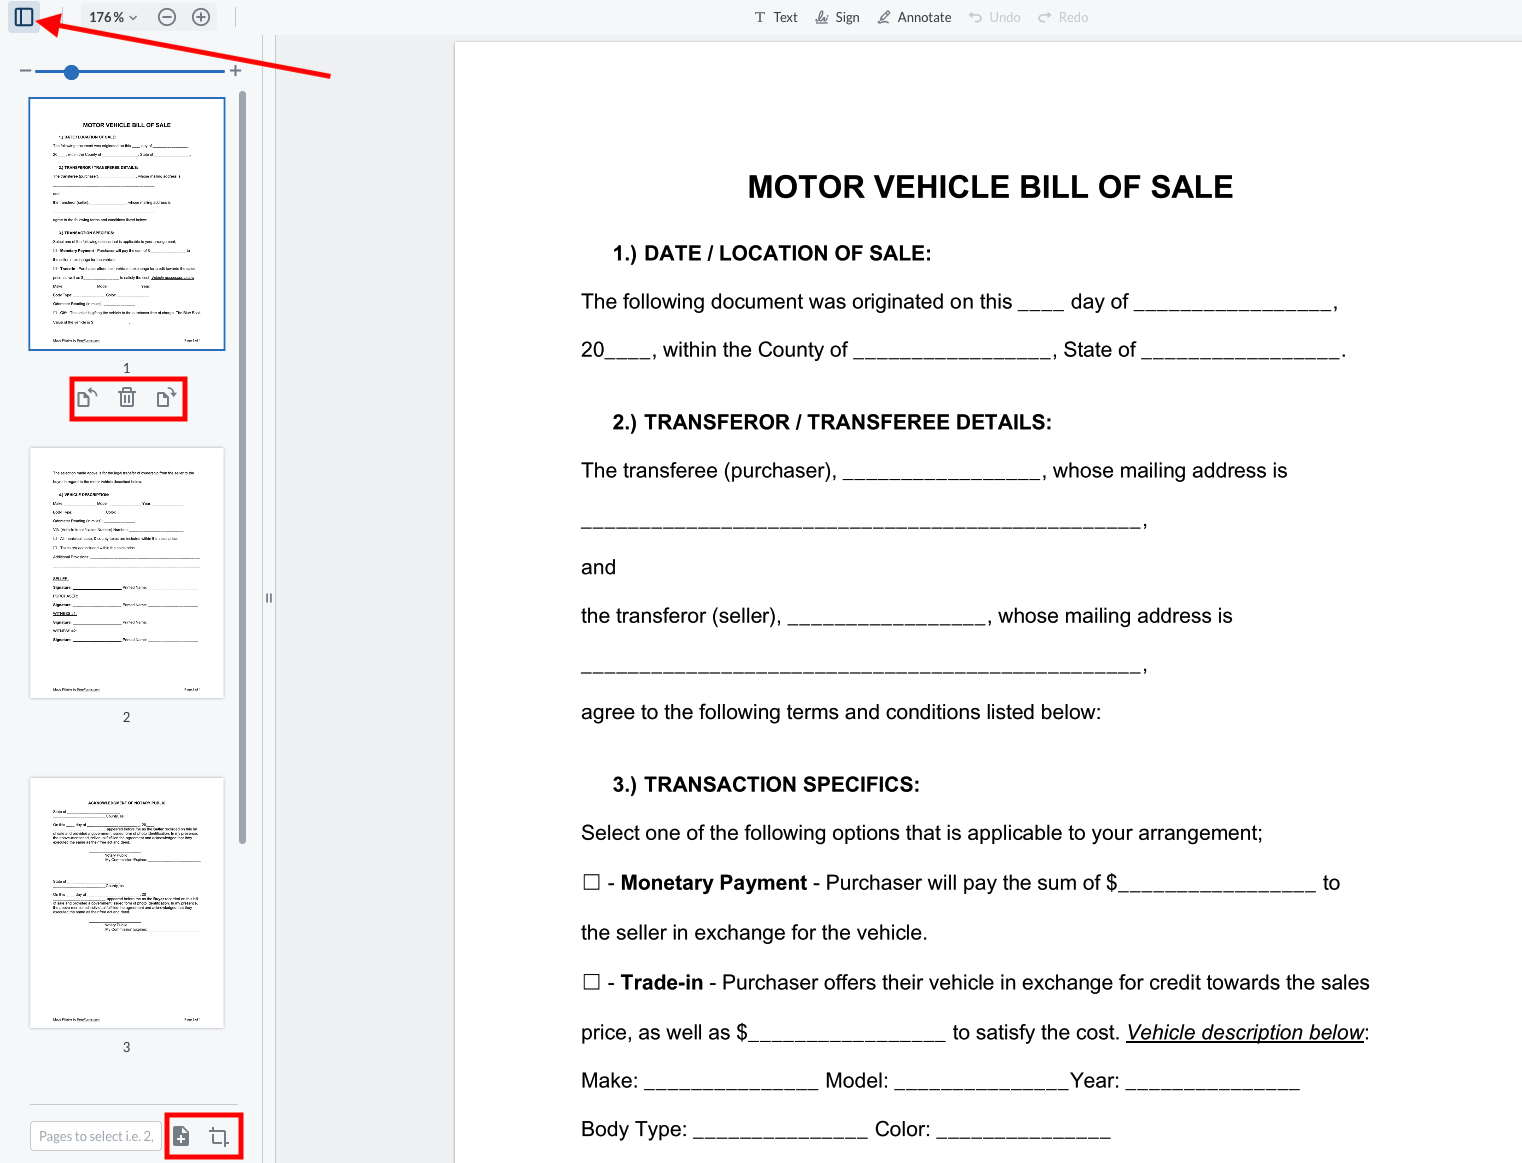
To modify the arrangement of pages in a PDF, users can select the page setup icon located in the left-hand corner of the editor. This will expand a side panel that displays thumbnails of all the pages contained within the document. Here, you will be able to add, delete, rotate, crop, and reorder pages to your liking.
In the screenshot below, you can see the location of each action’s icon. There is no button to click for reordering the pages, that requires the user to drag & drop the page into the desired position.
14. Downloading Your File
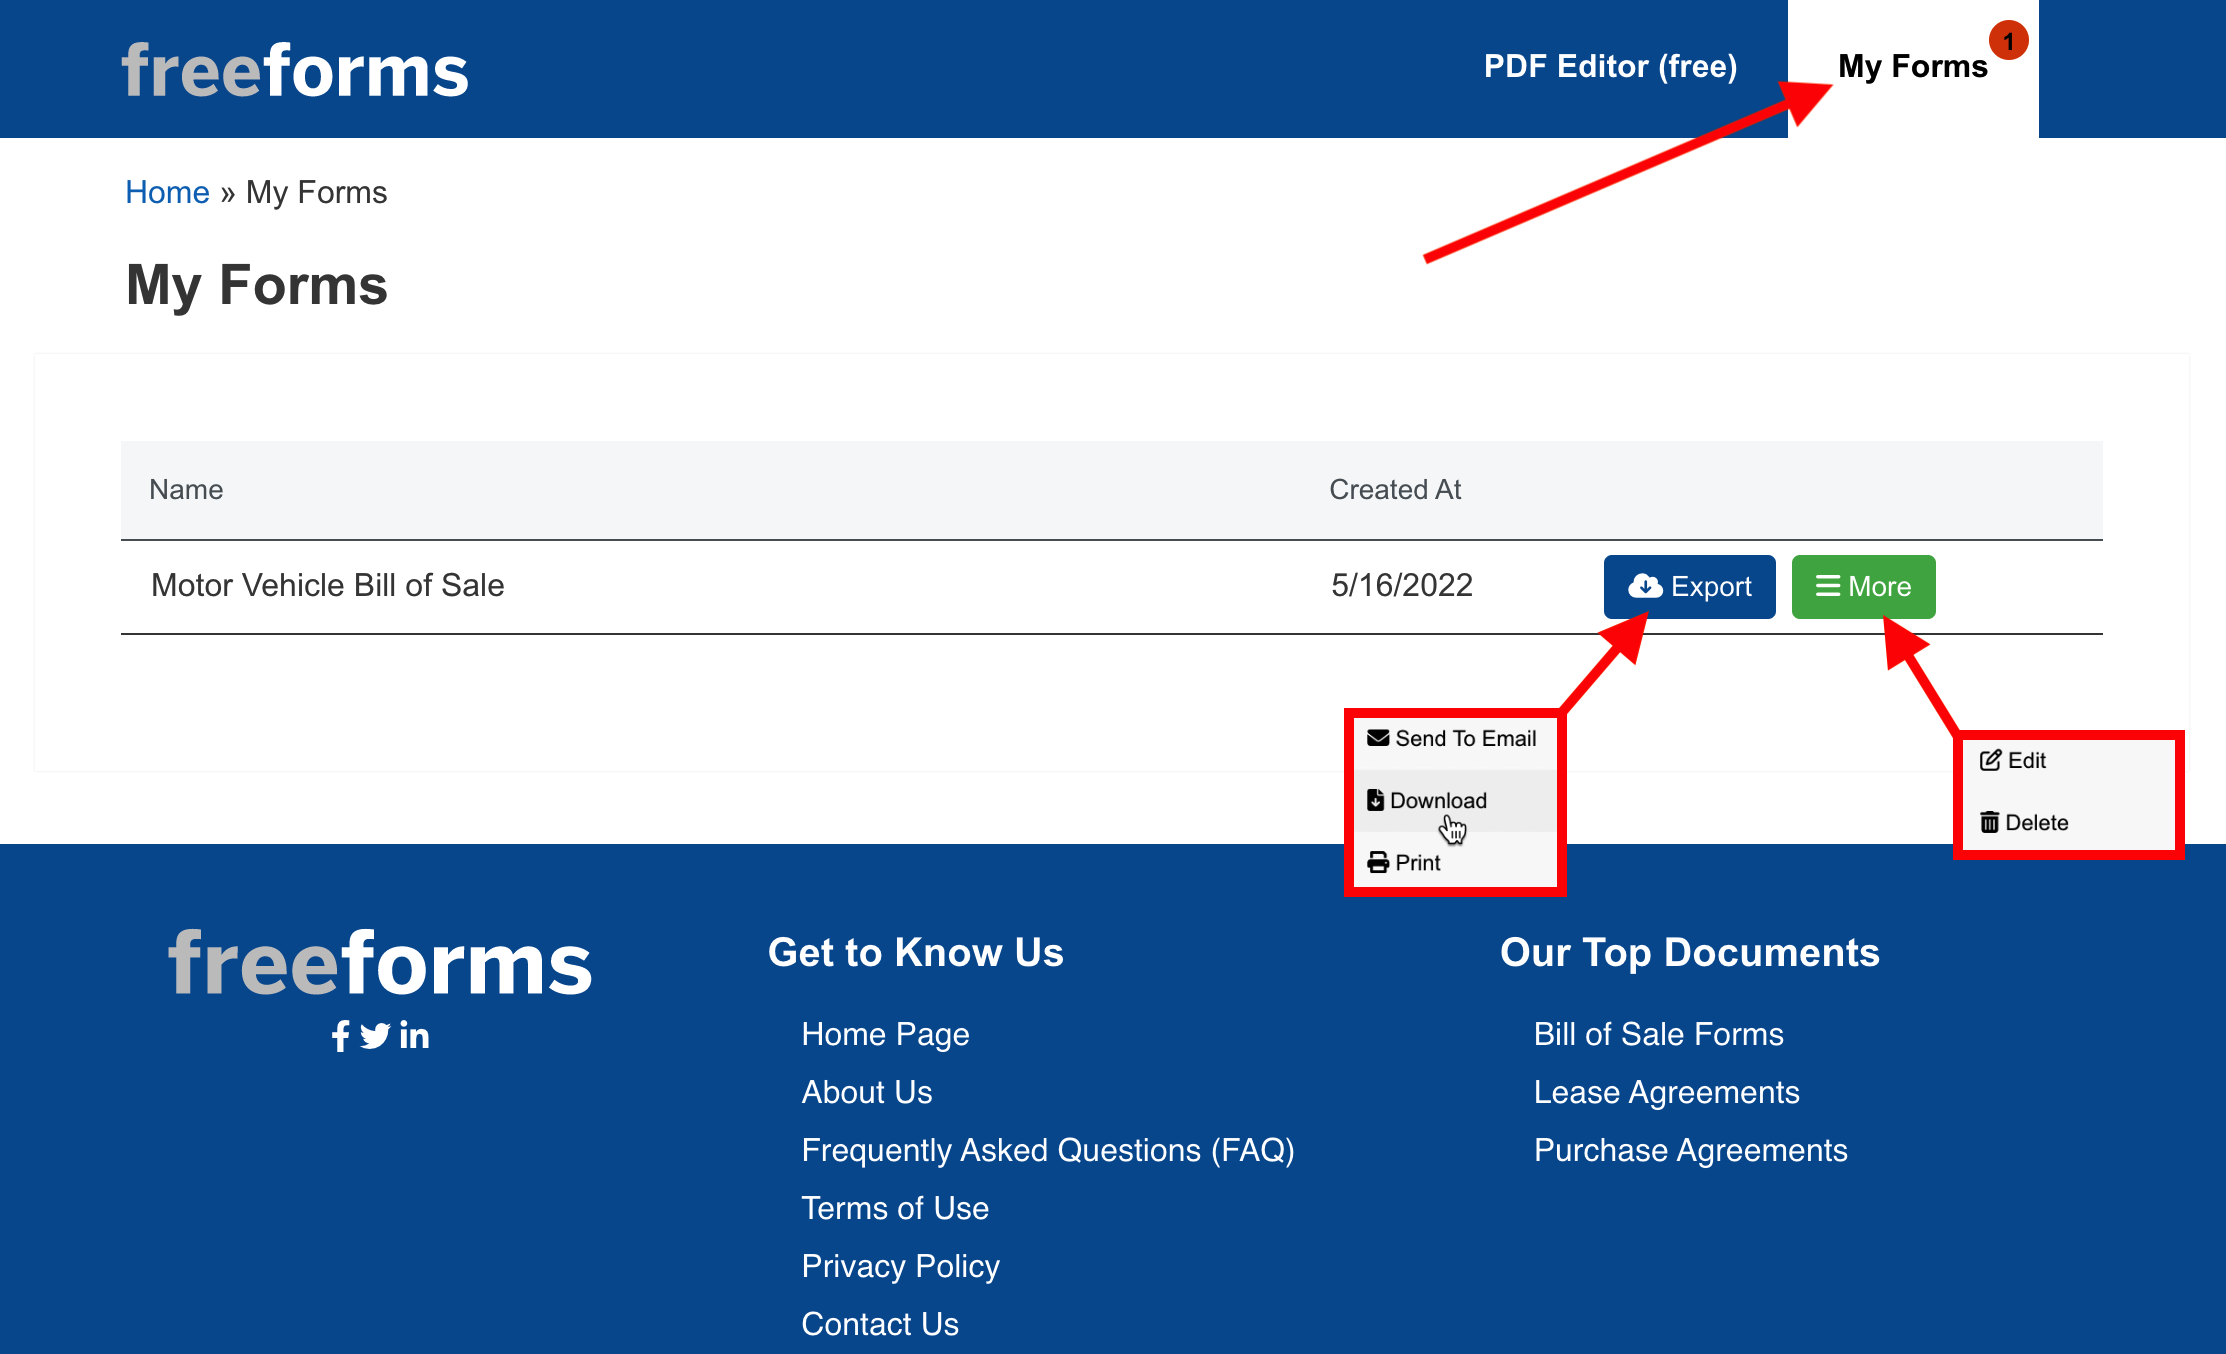
Once you are finished editing a PDF, click the orange “Done” button located in the upper right-hand corner of the editor. This will automatically direct you to the “My Forms” page of the website where your document is saved.
Here, you will be able to see any form that you have created using the website. Click “Export” in order to email, download, or print the document. You may also click the “More” option to further edit the PDF or delete it entirely.
Note: FreeForms does not store your document in our own database, it is saved in your browser’s cache. This means that your form may be lost if you clear certain browsing data.
